Products and Categories
2.4 Multiple Choice Products

Multiple Choice Products
A Multiple Choice Product allows you to add products as add-ons and extras to other products on the till.
For example, if you sell a burger on your till, but you want to sell add-ons with these burgers at an additional cost (e.g Bacon and Cheese), you would create these as Multiple Choice Products.
These can then all be grouped together to create a Multiple Choice Product Group.
How to create a Multiple Choice Product
First, you need to create the main product that you would like to attach add-ons and extras to - in this case, a plain burger. This is the same as creating a regular product.

The price for the regular product would be the price at which it is sold without any add-ons or extras - for example, a plain burger WITHOUT bacon or cheese.
Next, you need to create the add-ons and extras that you want to be assigned to the above product.
These need to be created as regular products first, as they are sold at an additional cost. The example below shows the extras Bacon and Cheese as add-ons at an additional cost.
When you create these products, add them to the same category as the product you want them as an extra on, and untick Sell On Till.

How to create a Multiple Choice Product Group
Now you have created your add-ons and extras, you can group them together so they can be assigned to a product.
Navigate to Management > Multiple Choice Products.
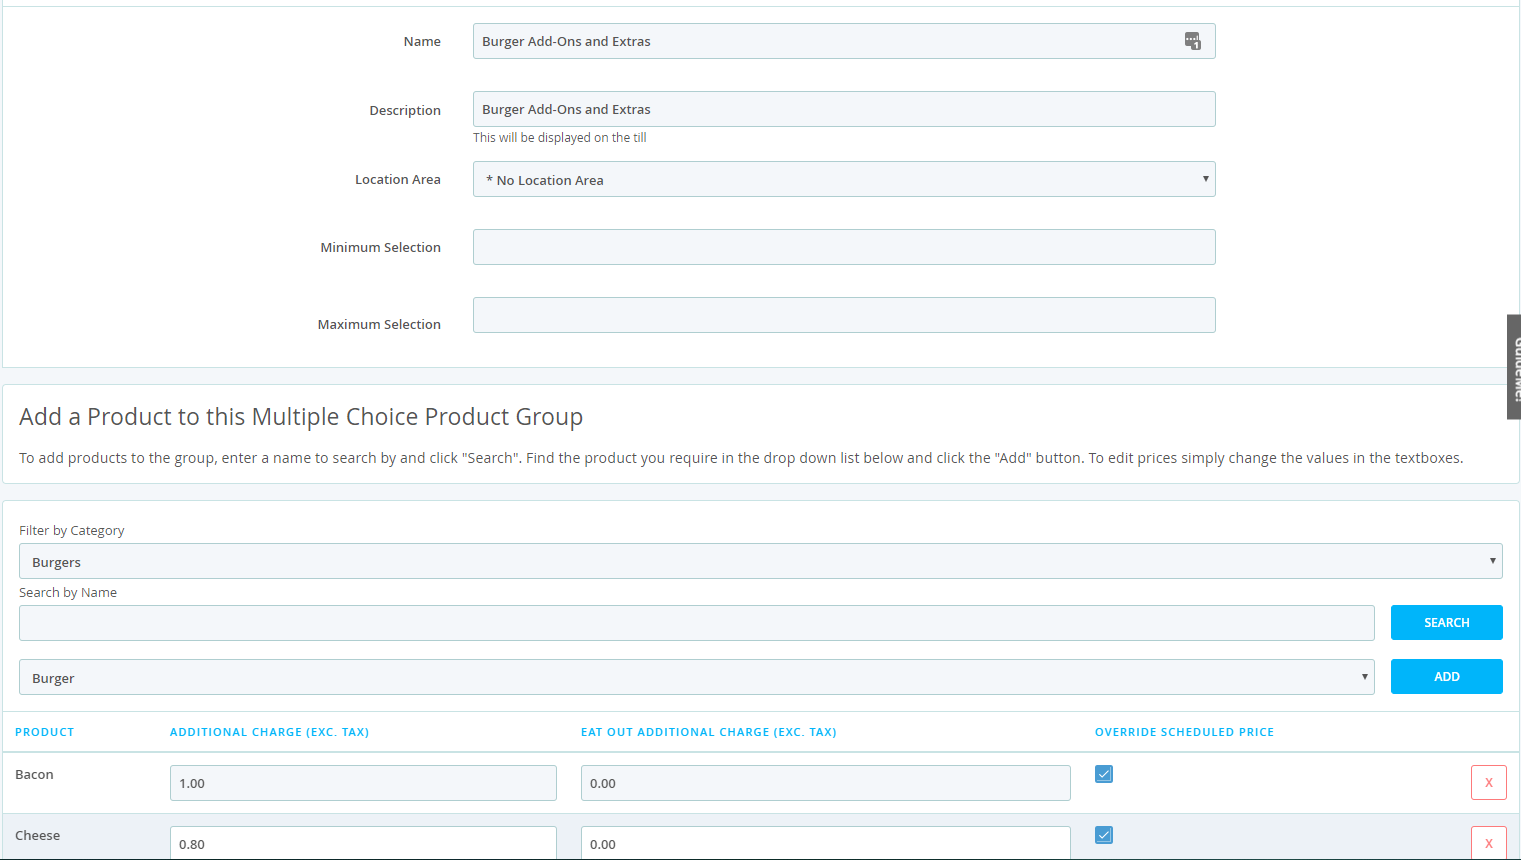
You now need to create your Multiple Choice Product Group. This group should contain all of the add-ons and extras that you want to assign to the original product. In this case, Bacon and Cheese.
Select Create Multiple Choice Product Group and name the Group of add-ons and extras.

If applicable, you can enter a minimum or maximum amount of add-ons and extras when selecting this product. Leave this blank if this is optional or if there is no limit.
Find the Category that you saved the add-ons into - this should be the same as the original product, and add these to the group as shown above.
Once you have added all of your extras and add-ons, press add at the bottom of the page.
You now need to add this group of add-ons and extras, to the original product.
Navigate to Management, and then go to your product list, and search for the original product.
Select Advanced on the product, and scroll down to the section called Multiple Choice Products as shown below.

If you wish to make these Add-Ons and Extras optional, tick the below box.
Press save, and go to your front till.
Once you’re on the front till, perform a Full Cloud Sync.
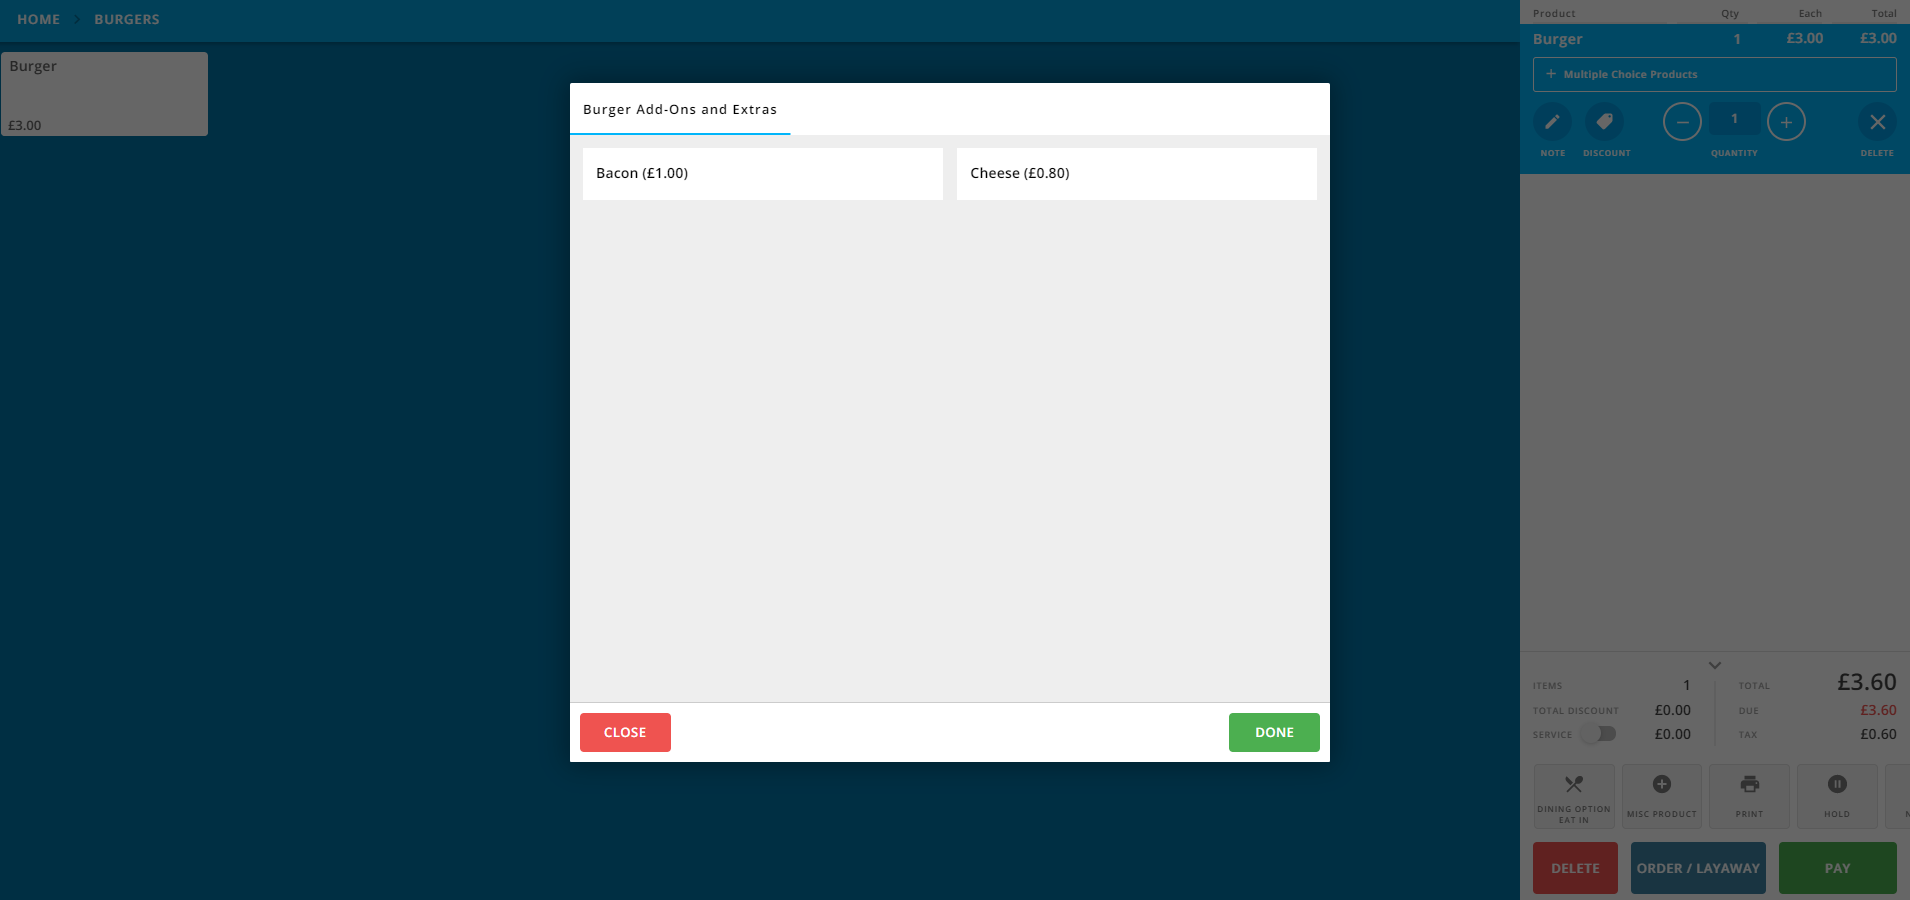
Select the original product that you have added extras on to. Once you select this, a pop up of the Multiple Choice Product Group will show on the screen, with the add-ons and extras as shown below.
