Products and Categories
2.5 Variants and Sizes

Setting up Variants and Sizes
Variants and Sizes are enabled by the Fashion Module, and are essentially multiples of one item.
Variants and Sizes are items that can be used to split items into variables; for example, clothes can be split into variables such as S,M,L.
Setup
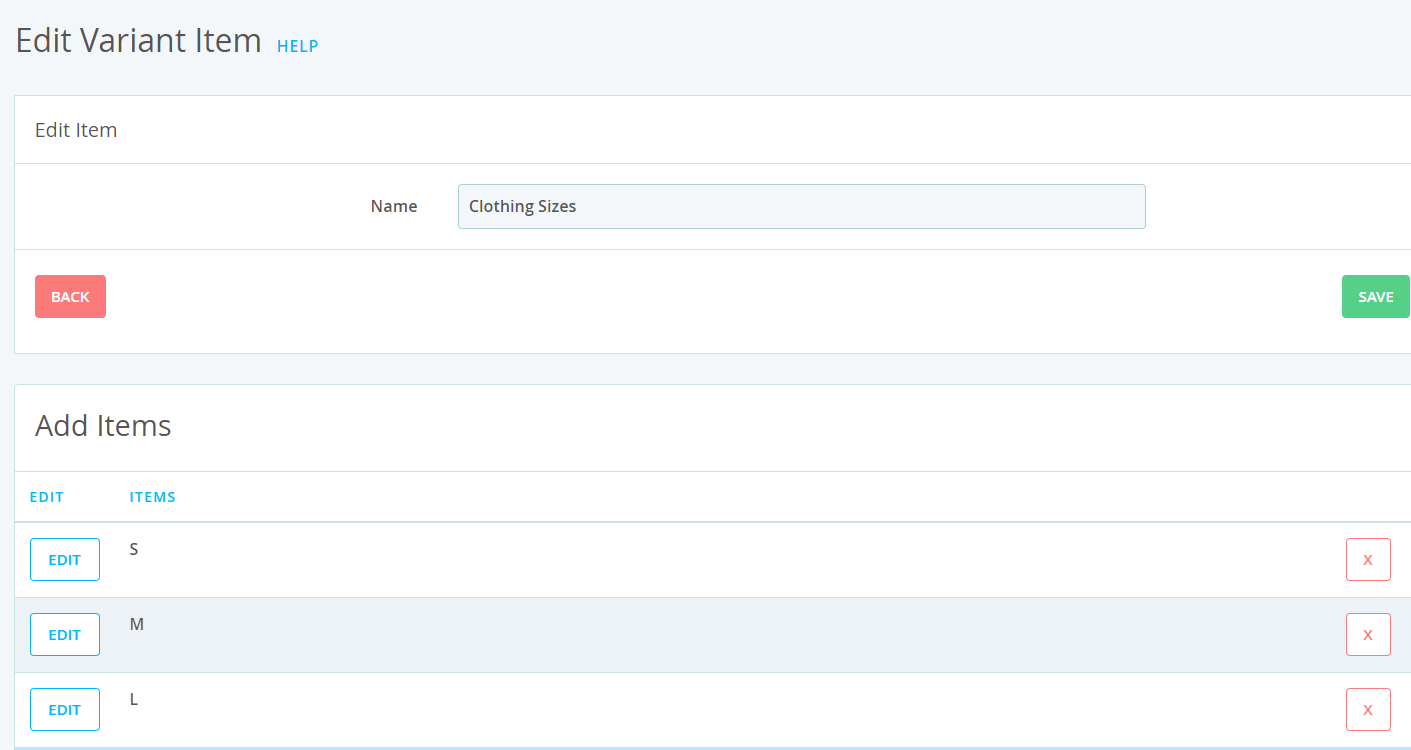
To set up Variants and or Sizes, you firstly need to add your Variant Group. This group must consist of all the variables you want the item to have attached to it.
In this example, we will use Small, Medium and Large.

PLEASE NOTE: You can’t have a Variant Group with only one Variant in. If only 1 is required, this will need to be setup as a STANDARD product
The Name of the Variant Map is used to identify the Variant Map when adding to a product; in the above instance, you could call the Variant Map ‘Clothing Sizes’
Once you have added all the different variants you will then need to create the Product you want to make multiples of. In this example we will use T-Shirt.
Fill in the relevant fields for the Product you are adding, and select the Variant you wish to add to this Product; in this example, the Variant Group we created above, Clothing Sizes.

If you want the Variant Items to be added to the same category as the one you have selected for this product, tick the Disable Colour and Variant Sub Category Creation.

If you want the Variants to have their own Category, leave this box unticked.
Once you add the product, each Variant will then be placed in a new Category created specifically for it.
If you require the system to generate a barcode for each newly created Variant, tick the Auto Generate Barcode for Variants box. If you do not require individual barcodes for each item, do not tick this box.
Once you add the product with selected Variants, this will ‘replace’ the original Base Item of ‘T-Shirt’, and 3 products called ‘T-Shirt S’, ‘T-Shirt M’ and ‘T-Shirt L’ will be created in its place.

If you do not add a Category when first creating the Product and you tick Disable Colour and Variant Sub Category Creation, the newly created items will not have a Category assigned and will be placed as top-level products.
If you do add a Category when first creating the Product and you tick Disable Colour and Variant Sub Category Creation, the newly created items will have the original Product’s Category assigned, and will be placed within that Category.
If you select a Category for the original Product and do not tick Disable Colour and Variant Sub Category Creation, then each newly created Variant Item will sit in a new category named the same as the original product; in this case, the original item that was added before selecting any variants was T-Shirt so the newly created category will be called T-Shirt.
Advanced Page on a Product
The second way of creating Variants of a Product is via the Advanced Page on a Product.
This method gives you a few more options to configure Variants.

You still obtain the options to Auto Generate Barcode for Variants and Disable Colour and Variant Sub Category Creation, but you can also create singular variants within this page, and also duplicate products but with a colour attached (if colours have been setup).
If you have a Variant Group that consists of S,M,L but you only need to create a Variant of ‘S’ then you can select the single Variant option and select the size ‘S’.

If you have colours setup, and you wish to assign a colour to your Variants as well as a Size, select the Duplicate Product with Colour Button.

Please note: The duplicate product with Colour Button can only apply this to one Variant at a time; in the above example, selecting this would create a product called ‘T-Shirt S - Black’ as shown below.

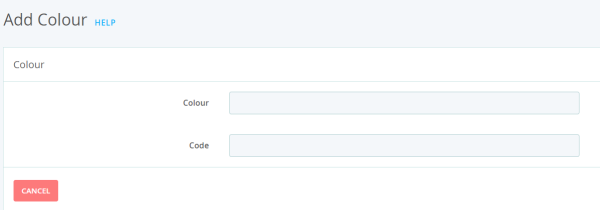
To set up Colours, navigate to Management > Colours
Within here you can add all the colours that you sell your products in.

The code section is only applicable if you are using these colours in Web Design or on a Website; it is used for assigning colours to pages or letters by typing in a code to obtain the exact colour required.