Stock Management
4.2 Managing and Taking Stock

Managing Stock
For items to show up in a stock take, they must first be made into stock tracking products. There are two ways to update the stock:
- Advanced Section of the products
- Bulk Import
Advanced
This method will allow you to update each product individually so that stock can be tracked and a stock take can be performed on the product. Go to Manage > Products > Product List
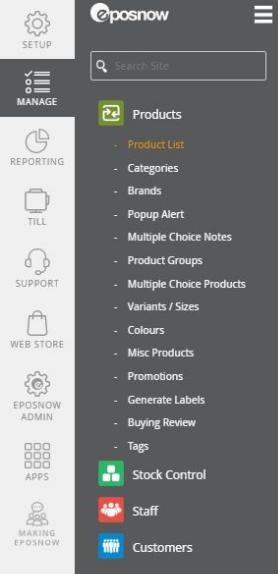
Once here, search for the product in question and click advanced.
Once in advanced options, scroll down to Stock Adjustment.

We advise 1 of 2 things here:
- Set the product to 0 stock level - this enables stock taking and Purchase Ordering
- Set the correct stock level (If known)
You need to update:
- Location
- Current Stock
- Current Volume (if using Master products)
- Reason
- Staff
- Supplier
Optional values are:
- Min Levels (used for autopulating purchase orders)
- Max Levels (used for autopulating purchase orders)
- Stock alerts
Once you have done this, please remember to click save. You are now able to see the products in Purchase Orders and Stock takes.

Bulk Import
The Bulk Import allows you to update all stock levels in 1 spreadsheet.
You can either set all products to 0 and perform a stock take or update the stock holdings to the correct levels.
To be able to update via Bulk Import, please follow these steps: Apps > My Apps > Bulk Import (Setup)
In here, please download the Stock Update Template.
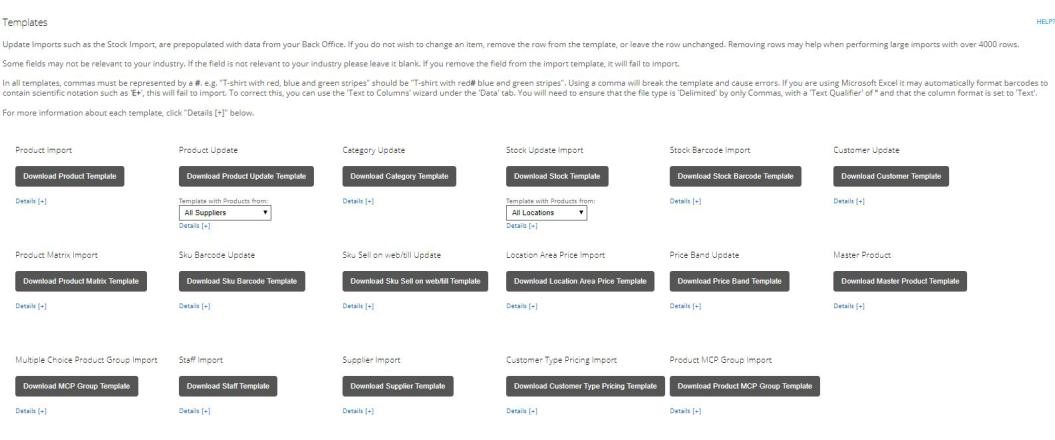
Once this sheet is downloaded, you will fill in for the correct products.
Please fill in:
- Current Stock
- Current Volume (if using Master products)
- Min Levels
- Max Levels
- Stock alerts
- Cost Price (optional)
Once you have saved the sheet, you need to upload this back into Epos Now.
If you scroll down from the update sheets, you come to the upload area.
Please select the file > Click Upload (check for any errors) > Import ( should be green and states imported)
If any errors occur, these will be in red and will tell you the issue. One issue could be the barcodes. Please make sure to format the barcode as a 0 decimal place number.

Stocktaking
Stocktaking involves physically counting all of your stock and matching this up to your stock records to discover any discrepancies. Stocktaking highlights stock control issues and areas your business needs to improve on in order to be even more profitable.
Front Till / Back Office Stock Take
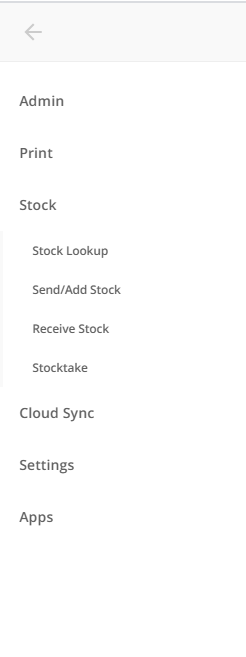
From the front till, select: menu > stock > stocktake.
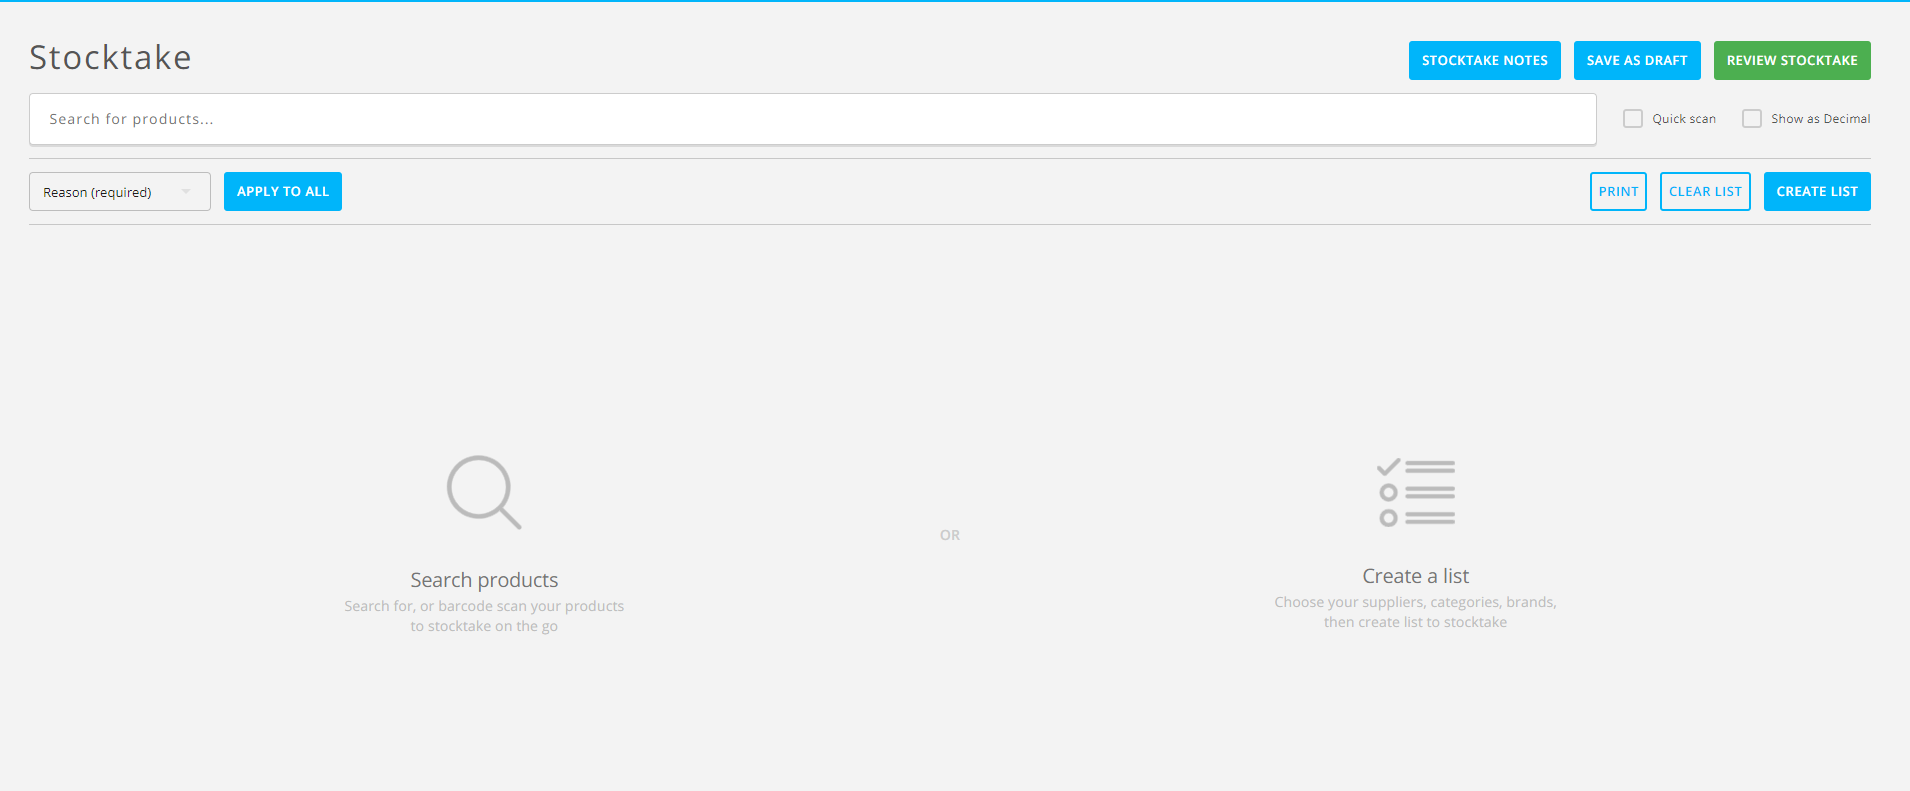
Once stocktake is selected, the stocktake screen will appear.
There are two ways to create a stocktake list: 1) you can manually search for the products, or 2) generate a list which will break it down between selected categories.
Manually creating a Stocktake
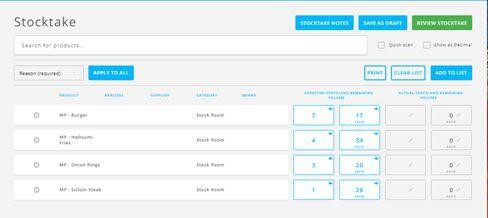
Once in the stocktake screen, you can search for your products that have stock associated with them. They will appear in a list and you can select which product you are doing a stocktake on. You can also scan the product barcode if this is set up.
Once selected, this will create a list of the products you have selected, showing the expected stock levels from products that have been sold and actual stock levels. These can be changed if the stock has any discrepancies. Show as decimal will allow the products to show the remaining quantity as a decimal rather than full numbers.
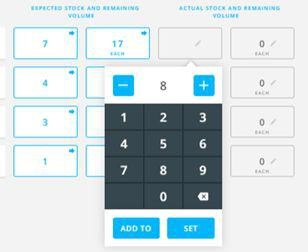
When adjusting stock levels, the system will bring up a keypad in which you can enter the amount of the products you have counted. You will then have to click set to save these changes.
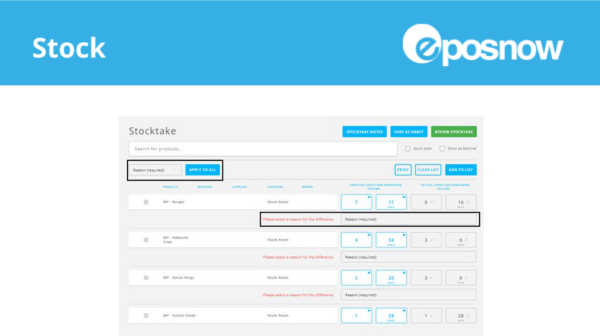
Once a new stock level has been set, the system will prompt to enter a reason from the drop down list. These can be set for each product if the stock adjustments are different reasons or you can select the reason and apply to all.
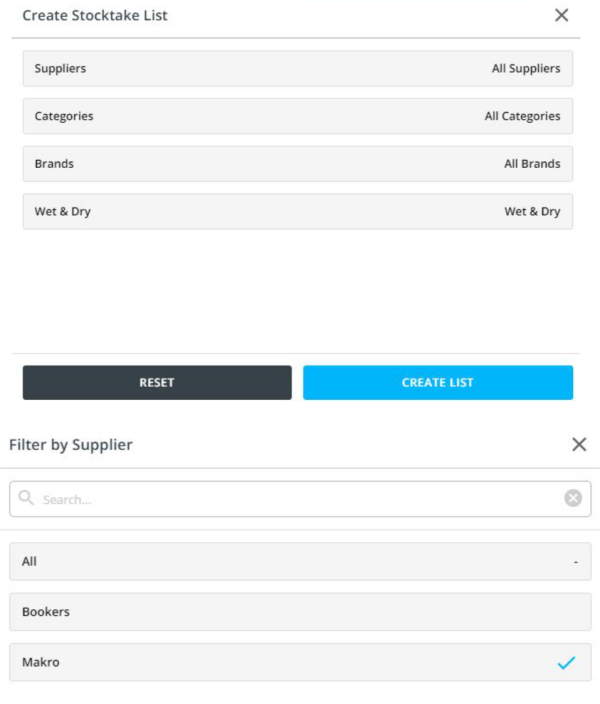
Create a stocktake list
You can also create stocktake lists based on suppliers, categories, brands or wet & dry to filter the products.
Completing a stocktake
Once the stocktake has been completed, you can add notes, save as a draft to complete at a later point or review the stocktake.
![]()
Once review stocktake has been selected, it will bring up a new section on the screen to show if there are any discrepancies or if there are any correct stock levels. From here, you can resume the stocktake, view/add any notes or complete. Once complete has been selected, it will bring you back to the main till screen.
Stocktakes can then be reviewed within the Back Office.
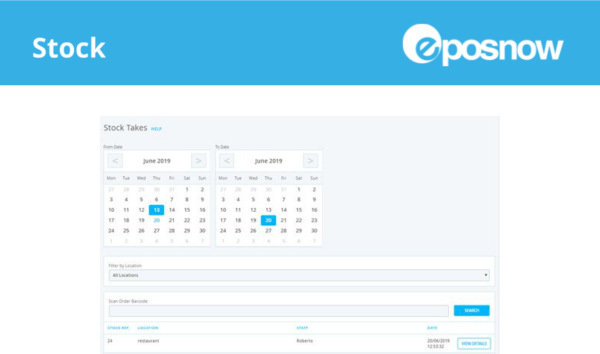
Once selected from the Back Office, you can select the date range or a specific date that stocktake would have been completed. You can then see details for each stocktake under the view details option.
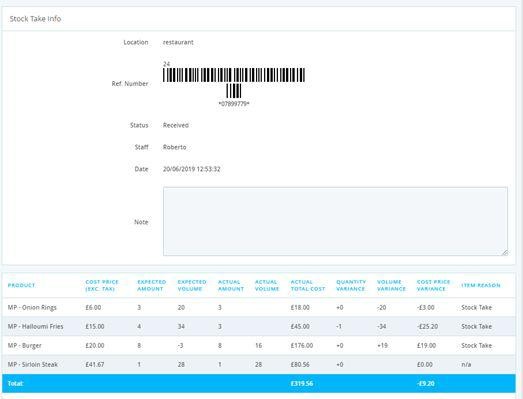
The view details option will show any variance on the products, with a total cost variance. This report can be exported into an excel file, csv, word or print.
Stock takes are available to be processed through the Back Office. Follow these steps:
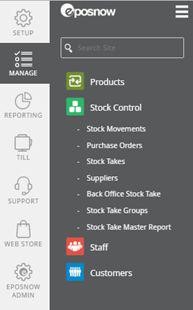
Manage > Stock Control > Back Office Stock take.
Here, you are able to process stock takes in exactly the same way as you would on the front till. You will have to select a member of staff processing and the location. You will also be able to associate the stocktake with a group.

Once Start stocktake has been selected, the screen will change to the same as a front till stocktake.
FAQ
Do I need stock added to products before performing a stocktake?
Yes, you will need stock associated with products before a stock take, if not the product won't appear in the search.

