Products and Categories
2.3 Setting up Products

How to set up products
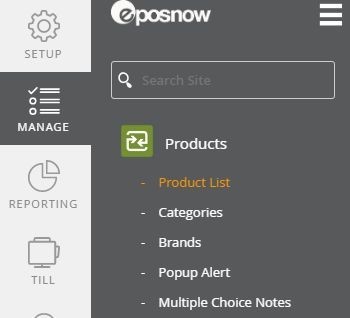
In the back office navigate to Manage > Products > Product List.

Once selected, a list of your products will appear which can be filtered by category or can be searched for via name, barcode or SKU.

Adding new products
To add a new product, select the button Add Product which is located in the top right-hand corner of the screen.

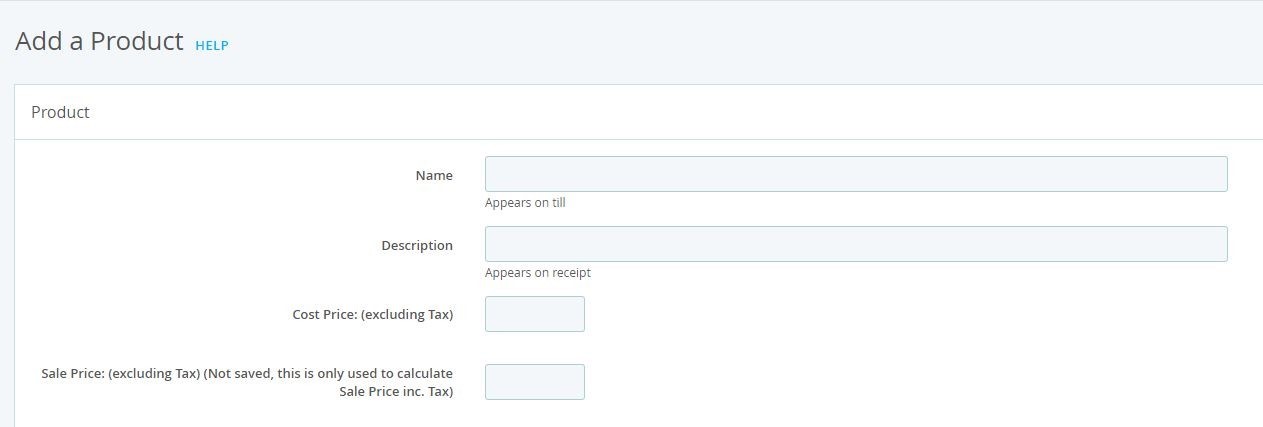
The Add a Product screen allows users to add in new products to the system.

- Name: What appears on the till
- Description: What appears on the customer receipt
- Cost price: Price this is bought in for
- Sale price: Price for the customer
- Tax Rate: Tax rate for the product
- Variable Price: Allows the user to set the price at point of sale
- Margin: Shows the profit margin of the product
- Barcode: Products barcodes can be entered or a new one can be generated
- Category: The category that the product sits within on Epos Now
- Brand: Brand of the product
- Supplier: Where the product is ordered from
- Product order code: Suppliers order code for purchase orders
- Article Code: Used for accounting
- Unit of sale/volume of sale: Used for master products
- Button Colour: Changes the colour of the product button on the till
- Popup note: A reminder for staff
- Multiple Choice note: When there is a choice but with no extra cost
- Till Order: Button position on the till
Once you have completed the fields applicable to your business, either select Add or Add Another if you wish to create multiple products.
After selecting Add you will return to the Product List page and the products recently created will appear at the top.
These can be sorted alphabetically ascending or descending by using the top headers in blue.