Getting Started
1.5 Receipts

Receipts
Webinar
Please watch this video or read the step-by-step instructions below.
- YouTubeSetting up receipts
You can easily set up receipts in your Epos Now back office by simply following the step-by-step guide below:
1. Go to Set Up > Company and click Receipts
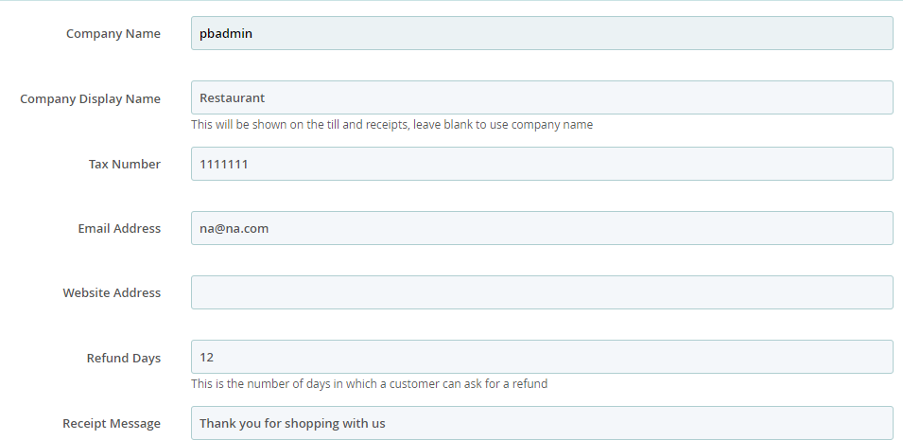
2. Fill in the following fields:
- Company Name
- Company Display Name - This will be shown on the till and receipts, leave blank to use the company name
- Tax Number
- Email Address
- Website Address
- Refund Days - This is the number of days in which a customer can ask for a refund
- Receipt Message - Custom message up to 500 characters
- Set custom font size - we recommend size 13-16

3. Enable/Disable the following checkboxes
- Show Tax Breakdown
- New Email Receipt - This allows users to send receipts by email after a transaction
- Show Customer Balance
- Show item notes and free multiple-choice products on receipt
- Group items and promotions on receipt
- Group items on order prints
- Use product name rather than the description on receipts
- Show barcodes on transaction receipts
4. Select your Barcode Type:
- Code 39 - Wider Printer Support
- Code 128 - Compatible with iOS and Android Scanners
5. Upload your Company Logo
- Use a JPG or PNG image no larger than 256 x 256 px
6. Click Save on the bottom right the screen