Getting Started
1.11 Table Management

Webinar
Please watch this video or read the step-by-step instructions below.
How to edit your table plan
The table plan function of the till is an easy way to let all staff know what food/drink orders belong to which tables. It also makes it easy for you to keep track of bills for your customers.
In order for the table plan to be active, make sure you have the “Table Module” installed. Contact Epos Now staff for help installing this module.
To edit a table plan from the Back Office
1. Go to Set Up > Locations and click Location & Devices
2. Select the location and hit Edit Table Plan
To edit table plan from the front Till
1. From the till screen when logged in as a manager Go to the menu > Admin and click Edit Table Plan

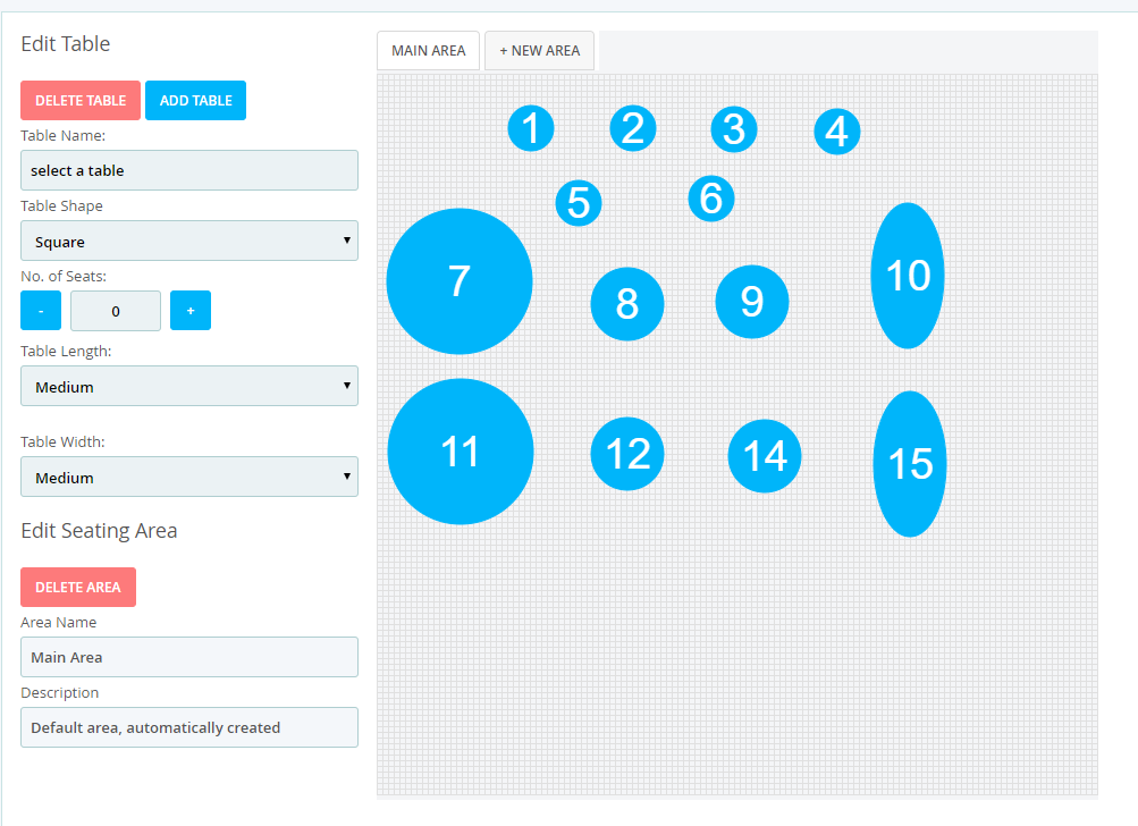
To create a new table, click on “Add Table”. This will add a medium-by-medium square table with a number that will go up sequentially, in the top left corner of the grid.
You are then able to drag the table to where you want it, change the size, and table shape (Circle, Square or Star). You can change the number of Covers on each table, and alter the table numbers
If your restaurant is split into separate rooms, you can name specific seating areas, and create a new seating area by clicking on the “+ New Area” button at the top of the page.
Make sure that when you are done with your table plan, you click on Save at the bottom right-hand corner of the page, or you will lose everything once you have left the page.
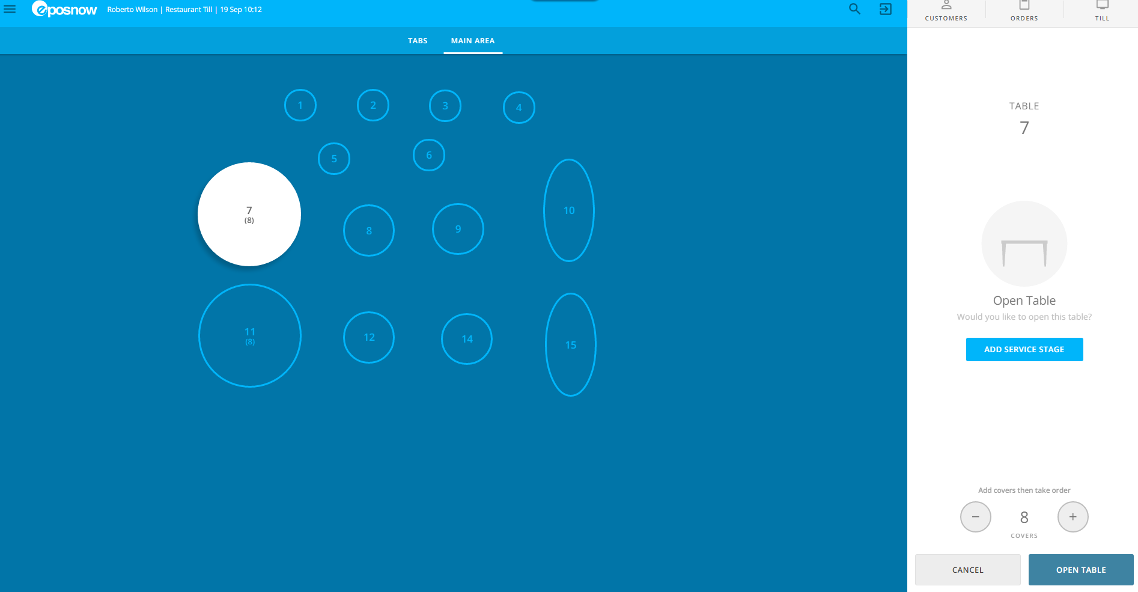
To reach the table plan from the front till, you will need to click on Tabs & Tables at the top of the transaction panel.

If you have tabs enabled, the page will open up by showing tabs first. But you can simply click on the name of the Table Area to show the tables in that plan.

You can set the number of covers actually sat on the table by clicking the Plus/Minus signs on the screen.
Open the table by clicking Open Table in the bottom right of the screen. You will then see the table number and the number of covers currently assigned to the table at the top of the transaction panel.
